Ever found yourself staring up at a ceiling grid that just won’t sit right? Or maybe you’ve been scratching your head over how to work around those tricky ductwork obstacles? If you’ve tackled suspended ceiling installation before, you’ll know it’s one of those jobs that looks straightforward until you’re actually up the ladder with tiles in hand.
Here’s the thing—getting a suspended ceiling installation to look professionally finished takes more than just following basic instructions. It’s about understanding the small details that separate a decent job from an exceptional one. Whether you’re fitting out a commercial office space in Melbourne or renovating a retail unit in Sydney, the techniques you use can make or break the final result.
In this guide, we’ll walk you through advanced methods that seasoned installers rely on. You’ll discover how to achieve perfect grid alignment, work around obstacles like a pro, and troubleshoot common issues that crop up on site. Plus, we’ll cover the tools worth investing in and help you figure out when it’s time to call in the experts. Let’s get stuck into it.
Understanding Suspended Ceiling Installation Systems
Types of Suspended Ceiling Grids and Tiles
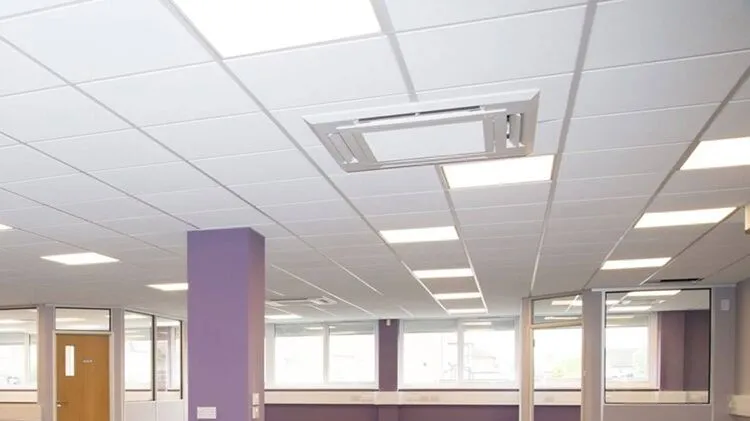
Not all suspended ceiling installation are created equal. The grid system you choose sets the foundation for everything else. You’ve got your standard exposed grid systems—the most common type you’ll see in commercial settings—where the metal framework remains visible. Then there are concealed grid systems, which create a seamless appearance by hiding the supporting structure behind the tiles.
Tile options vary just as much. Mineral fibre tiles offer excellent acoustic properties, making them popular in offices and schools. Metal tiles bring durability and a modern aesthetic to the table. For areas needing extra moisture resistance, think vinyl-faced or fibreglass-reinforced options. Your choice depends entirely on the space’s requirements and the look you’re after.
Key Components You’ll Need for a Professional Finish
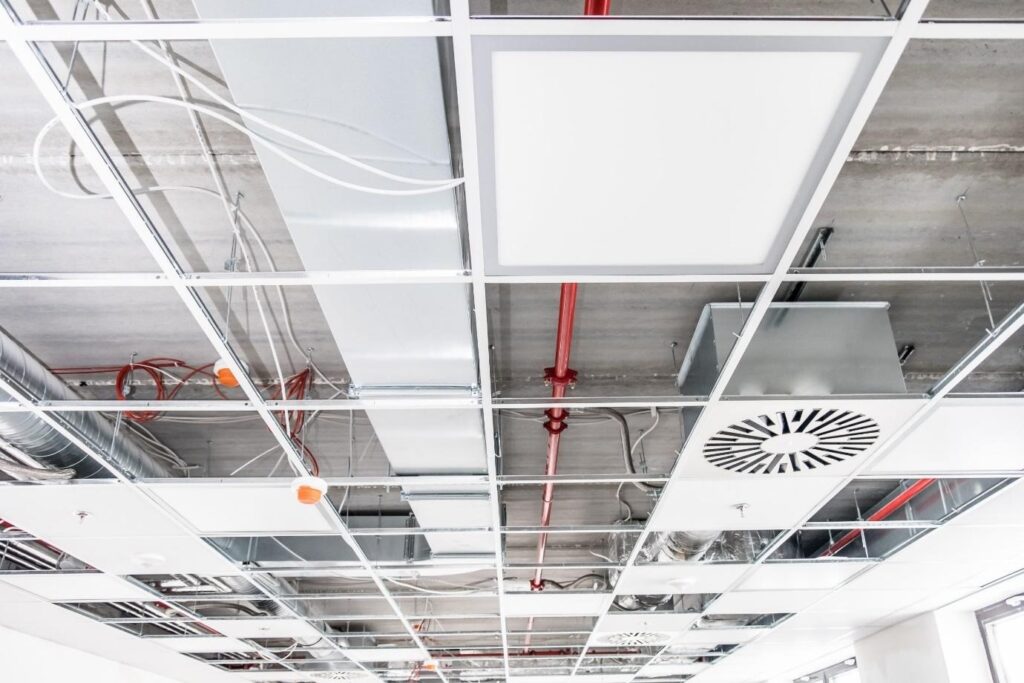
Beyond tiles and grids, you’ll need main runners, cross tees, wall angles, and suspension wires. Main runners span the length of the room, while cross tees slot in perpendicular to create that classic grid pattern. Wall angles provide a clean edge where the ceiling meets the walls.
Don’t skimp on quality here. Cheaper components can lead to sagging, misalignment, and a ceiling that looks tired within months. Invest in sturdy hangers and high-quality suspension wire rated for your ceiling’s weight.

Pre-Installation Planning for Success
How to Accurately Measure and Map Your Ceiling Space
Proper measurement is absolutely key. Start by sketching out your room dimensions, including any alcoves, columns, or irregular sections. Use a laser level to establish your working height—it’s far more accurate than spirit levels for larger spaces.
Mark reference points on all walls at your chosen ceiling height. This creates a consistent guide around the entire room. For complex layouts, consider creating a scaled drawing that shows exactly where each grid component will sit.
Calculating Materials: Avoiding Costly Mistakes
Running short mid-project is frustrating. Running massively over-budget isn’t great either. Here’s a practical approach: calculate your exact tile count based on room dimensions, then add 10% for cuts and mistakes. For commercial projects, bump that contingency to 15%.
Count your main runners by measuring the room length and factoring in standard runner lengths (typically 3.6m or 3.7m). Cross tees depend on your grid pattern—600mm x 600mm layouts need more than 600mm x 1200mm configurations.
What Height Should a Suspended Ceiling Be?
Building codes in Australia typically require minimum ceiling heights of 2.4m for habitable rooms. However, you’ll also need clearance above the suspended ceiling installation, access, and building regulations. Most installations sit 100-200mm below the original ceiling, but this varies based on:
– Existing ductwork and services
– Lighting requirements
– Fire safety regulations
– Access needs for maintenance
Advanced Installation Techniques
Achieving Perfect Grid Alignment Every Time
Here’s where experience really counts. Start your layout from the centre of the room, not the edges. This balances border tiles on opposite walls, creating a symmetrical appearance that looks intentional rather than rushed.
Use a chalk line to mark your main runner positions across the ceiling. Check these against your wall angles before installing anything. It’s much easier to adjust chalk lines than relocate hangers.
String a taut line along your first main runner’s path. This acts as a visual guide, helping you spot any deviation before it becomes a problem. Install hangers at maximum 1200mm centres—closer if you’re using heavier tiles.
How Do You Install a Suspended Ceiling in an Uneven Space?
Older buildings throw up challenges. Sloping original ceilings, wonky walls, and structural beams that appear from nowhere—these are all par for the course.
The solution? Establish your lowest point first. This becomes your reference height. Every other element works up from there. Use adjustable hangers to accommodate variations in the original ceiling height. For extreme slopes, you might need to install additional supports or consider a stepped ceiling design.
With uneven walls, custom-cut your border tiles on-site rather than relying on standard measurements. Scribe each tile to fit, creating a professional finish despite the imperfections.
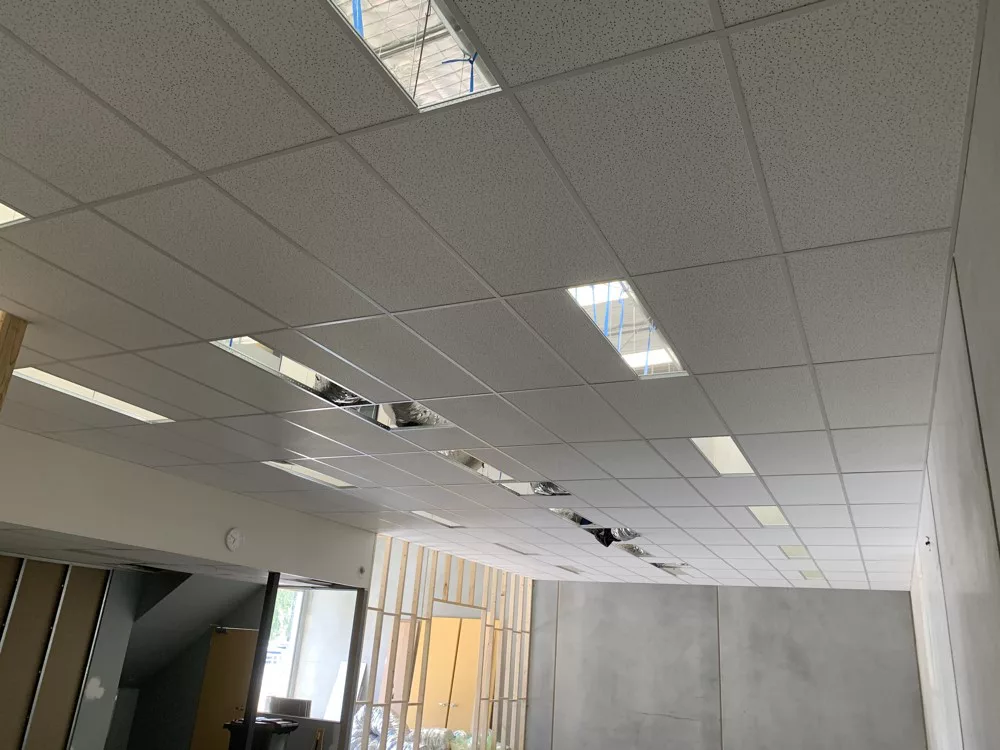
Working Around Obstacles: Lights, Vents, and Services
Plan your lighting layout before installing the grid—not after. Retrofit lighting into an existing suspended ceiling installation is possible but far more time-consuming. Mark light positions on your layout drawing and ensure cross tees support any cut tile sections.
For air conditioning vents and diffusers, coordinate with the mechanical services team. Their ductwork positions dictate your tile cuts. Leave enough clearance for proper airflow and future maintenance access.
Fire sprinklers require careful attention. Australian regulations specify clearance requirements around sprinkler heads. Check with your fire safety consultant before finalising tile positions near these fittings.
Professional Tips for Cutting Ceiling Tiles Cleanly
Sharp tools make all the difference. Use a fresh blade in your utility knife for every project. For mineral fibre tiles, score the face side first, then snap along the line. Clean up edges with fine sandpaper if needed.
Metal tiles demand different treatment—tin snips or a nibbler attachment for your drill work best. Always wear safety glasses and gloves when cutting metal tiles.
Measure twice, cut once isn’t just a saying—it’s essential when you’ve got limited spare tiles.
Common Installation Challenges and How to Overcome Them
How Do You Fix a Sagging Suspended Ceiling?
Sagging typically stems from three causes: overloaded tiles, insufficient hangers, or failing suspension points. Start by identifying the source. Check hanger spacing against manufacturer recommendations. Inspect wire connections at the ceiling—corrosion or loose fittings cause gradual drooping.
For quick fixes, add extra hangers to redistribute weight. If tiles themselves are warped, replacement is your only option. Prevent future sagging by never exceeding tile weight limits and maintaining proper hanger spacing.
Dealing with Structural Irregularities in Older Buildings
Heritage buildings present unique challenges. Original ceilings might be lath and plaster, concrete, or timber—each requiring different fixing methods. Avoid drilling into asbestos-containing materials; always test first if the building predates 1990.
For unstable fixing points, consider secondary support frameworks or consult a structural engineer. Sometimes the safest approach is attaching to walls rather than overhead structures.
Can You Install a Suspended Ceiling by Yourself?
Technically, yes. Practically? It depends on scope. Small rooms with straightforward layouts are manageable solo, though having a helper speeds things up considerably.
Larger commercial installations really benefit from experienced teams. Grid alignment, heavy tile handling, and working at height safely all become easier with proper crew support.
Tools and Equipment That Speed Up Installation
Essential Tools for Professional Results
Your basic toolkit should include:
– Laser level (non-negotiable for accuracy)
– Tin snips and utility knife
– Pop rivet gun
– Chalk line
– Measuring tape and framing square
– Safety equipment (glasses, gloves, hard hat)
Time-Saving Equipment Worth the Investment
Ceiling tile lifters reduce fatigue and improve accuracy when placing tiles overhead. Cordless tools—particularly drills and impact drivers—eliminate trailing cables that cause trip hazards.
For regular installers, a dedicated tile cutter pays for itself in time saved and cleaner cuts.
Cost Considerations and Budgeting
How Much Does Suspended Ceiling Installation Cost?
In Australia, expect to pay between per square metre for supply and installation, depending on tile quality and project complexity. Commercial projects with high-performance acoustic tiles sit at the upper end. Basic installations in straightforward spaces cost less.
Balancing Quality and Budget for Commercial Projects
Don’t sacrifice quality on components that affect longevity. Budget tiles might save money upfront but replacement costs add up quickly. Focus spending on high-visibility areas while using standard materials in back-of-house spaces.
When to Hire a Professional Installer
Signs Your Project Needs Expert Help
Complex layouts, heritage buildings, and projects requiring fire-rated ceilings all warrant professional involvement. If you’re unsure about structural loading or regulatory compliance, get expert advice.
What to Look for in a Suspended Ceiling Contractor
Check for relevant licensing and insurance. Ask for references from similar projects. A reliable contractor will happily discuss their approach and provide detailed quotes.
Elevating Your Suspended Ceiling Installation Game
Getting suspended ceiling installation right comes down to preparation, technique, and knowing when to call for backup. We’ve covered everything from grid alignment tricks to tackling those awkward obstacles that every installer faces.
The key takeaway? Invest time in planning before you pick up a single tile. Accurate measurements, proper material calculations, and thoughtful layout design prevent headaches down the track. Quality components and appropriate tools make the actual installation smoother and deliver results that last.
Whether you’re tackling your next project solo or working alongside a team, these advanced techniques will help you achieve that professional finish. Take your time, work methodically, and don’t be afraid to step back and reassess if something isn’t sitting right. Your ceiling—and your client—will thank you for it.